Pixelmator
Masking Made Simple
Always remember that the number one rule with Masks is BLACK HIDES and WHITE SHOWS


Using a Mask to Hide Text
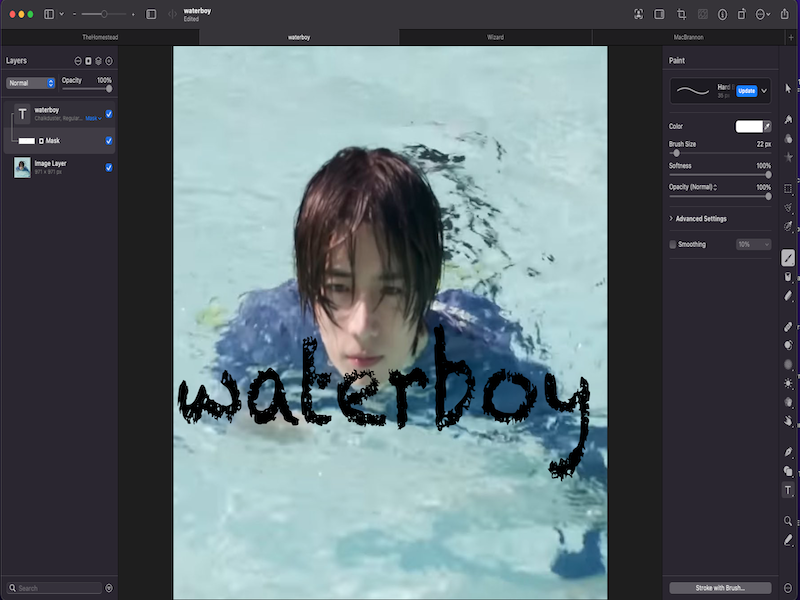
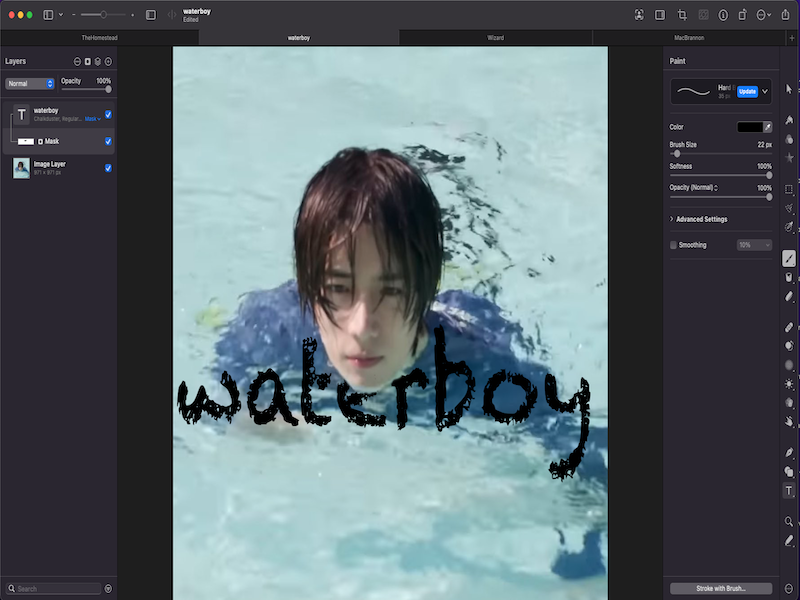
Once you've loaded an image into Pixelmator Pro, click the Text icon or just type the letter "t" on your keyboard and put some text on your image. You'll notice once you've done that that Pixelmator has added a new text layer in the layer's panel just above your image layer so right-click that newly created text layer and in the drop-down menu click Add Mask and now you'll see that a slender white mask has appeared with a bracket connecting it to the text layer so click done at the bottom of the screen
Click the Paint icon (looks like a fountain pen and not a paint brush) or type the letter "b" to get to the Paint tool. Now click inside the little window next to the eyedropper to choose a color. What we want to do is to get rid of the text covering the boy's face so we want to pick the color black because BLACK HIDES and WHITE SHOWS and we want to make the mask black around the boy's face. Just use the slider to make your paint brush any size you want and WITH THE MASK LAYER SELECTED in the layers column start painting the text around the boy's face to hide the text
Let's say you've inadvertently used the black brush to painted away too much text
You could hit command z to redo but a more fun way is to click in the color picker window again and make your paint brush white because BLACK HIDES and WHITE SHOWS and paint around the removed text to make it show again